Instance Segmentation model#
This tutorial provides a step-by-step guide — from installation to model training — for the instance segmentation task using a specific example.
To learn more about the instance segmentation task, refer to Instance Segmentation.
In this tutorial, we demonstrate how to train and validate the MaskRCNN-R50 model on the publicly available WGISD dataset. For details on how to export, optimize, and deploy the trained model, refer to Deploy & Demo.
To provide a concrete example, all commands in this tutorial use the MaskRCNN-R50 model — a medium-sized architecture that offers a good trade-off between accuracy and inference speed.
This process has been tested with the following configuration:
Ubuntu 20.04
NVIDIA GeForce RTX 3090
Intel(R) Core(TM) i9-11900
CUDA Toolkit 11.8
Setup virtual environment#
1. You can follow the installation process from a quick start guide to create a universal virtual environment for OpenVINO™ Training Extensions.
2. Activate your virtual environment:
.otx/bin/activate
# or by this line, if you created an environment, using tox
. venv/otx/bin/activate
Dataset preparation#
1. Clone a repository with WGISD dataset.
mkdir data ; cd data
git clone https://github.com/thsant/wgisd.git
cd wgisd
git checkout 6910edc5ae3aae8c20062941b1641821f0c30127
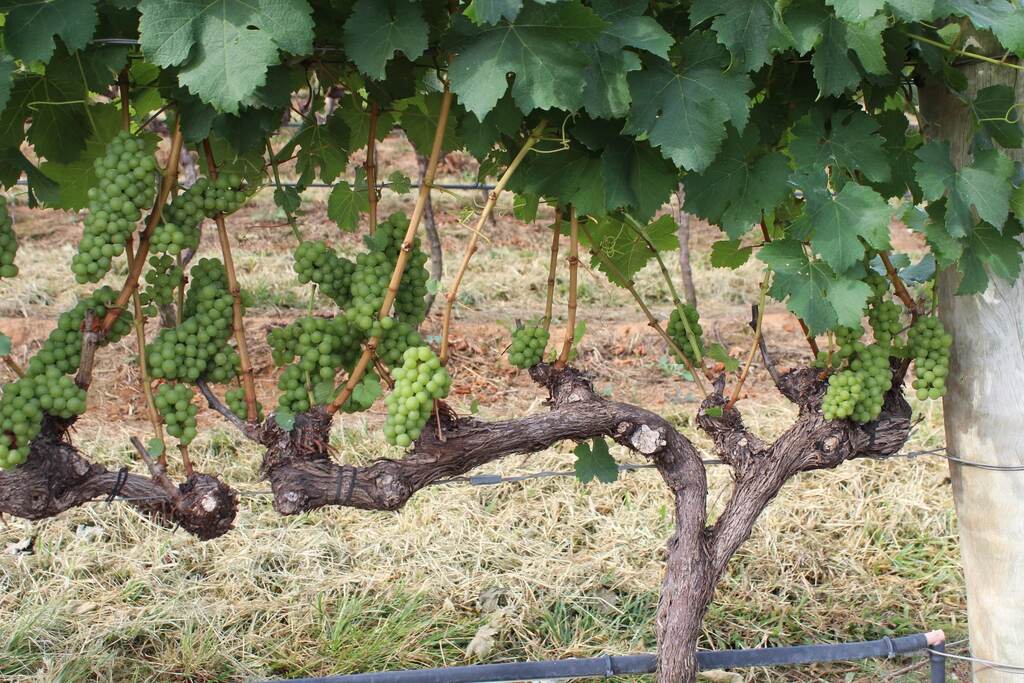
This dataset contains images of grapevines with the annotation for different varieties of grapes.
CDY- ChardonnayCFR- Cabernet FrancCSV- Cabernet SauvignonSVB- Sauvignon BlancSYH- Syrah
2. Check the file structure of downloaded dataset, we will need the following file structure:
wgisd
├── annotations/
    ├── instances_train.json
    ├── instances_val.json
    └── instances_test.json
├──images/
    ├── train
    ├── val
    └── test
(There may be more extra unrelated folders)
We can do that by running these commands:
# format images folder
mv data images

# format annotations folder
mv coco_annotations annotations

# rename annotations to meet *_train.json pattern
mv annotations/train_polygons_instances.json annotations/instances_train.json
mv annotations/test_polygons_instances.json annotations/instances_val.json
cp annotations/instances_val.json annotations/instances_test.json

cd ../..
Note
We can use this dataset in the detection tutorial. refer to Object Detection model.
Training#
1. First of all, you need to choose which instance segmentation model you want to train. The list of supported recipes for instance segmentation is available with the command line below.
Note
The characteristics and detailed comparison of the models could be found in Explanation section.
(otx) ...$ otx find --task INSTANCE_SEGMENTATION

┏━━━━━━━━━━━━━━━━━━━━━━━┳━━━━━━━━━━━━━━━━━━━━━━━━━━━━━━━┳━━━━━━━━━━━━━━━━━━━━━━━━━━━━━━━━━━━━━━━━━━━━━━━━━━━━━━━━━━━━━━━━━━━━━━━━━━━━━━━━━━━━┓
┃ Task                  ┃ Model Name                    ┃ Recipe Path                                                                        ┃
┡━━━━━━━━━━━━━━━━━━━━━━━╇━━━━━━━━━━━━━━━━━━━━━━━━━━━━━━━╇━━━━━━━━━━━━━━━━━━━━━━━━━━━━━━━━━━━━━━━━━━━━━━━━━━━━━━━━━━━━━━━━━━━━━━━━━━━━━━━━━━━━┩
│ INSTANCE_SEGMENTATION │ openvino_model                │ src/otx/recipe/instance_segmentation/openvino_model.yaml                           │
│ INSTANCE_SEGMENTATION │ maskrcnn_r50                  │ src/otx/recipe/instance_segmentation/maskrcnn_r50.yaml                             │
│ INSTANCE_SEGMENTATION │ maskrcnn_r50_tile             │ src/otx/recipe/instance_segmentation/maskrcnn_r50_tile.yaml                        │
│ INSTANCE_SEGMENTATION │ maskrcnn_swint                │ src/otx/recipe/instance_segmentation/maskrcnn_swint.yaml                           │
│ INSTANCE_SEGMENTATION │ maskrcnn_efficientnetb2b      │ src/otx/recipe/instance_segmentation/maskrcnn_efficientnetb2b.yaml                 │
│ INSTANCE_SEGMENTATION │ rtmdet_inst_tiny              │ src/otx/recipe/instance_segmentation/rtmdet_inst_tiny.yaml                         │
│ INSTANCE_SEGMENTATION │ rtmdet_inst_tiny_tile         │ src/otx/recipe/instance_segmentation/rtmdet_inst_tiny_tile.yaml                    │
│ INSTANCE_SEGMENTATION │ maskrcnn_efficientnetb2b_tile │ src/otx/recipe/instance_segmentation/maskrcnn_efficientnetb2b_tile.yaml            │
│ INSTANCE_SEGMENTATION │ maskrcnn_swint_tile           │ src/otx/recipe/instance_segmentation/maskrcnn_swint_tile.yaml                      │
└───────────────────────┴───────────────────────────────┴────────────────────────────────────────────────────────────────────────────────────┘
from otx.backend.native.cli.utils import list_models

model_lists = list_models(task="INSTANCE_SEGMENTATION")
print(model_lists)
'''
[
  'maskrcnn_swint',
  'maskrcnn_r50',
  'maskrcnn_r50_tile',
  'rtmdet_inst_tiny',
  'rtmdet_inst_tiny_tile',
  'maskrcnn_swint_tile',
  'maskrcnn_efficientnetb2b_tile',
  'openvino_model',
  'maskrcnn_efficientnetb2b',
]
'''
2. On this step we will configure configuration with:
all necessary configs for maskrcnn_r50
train/validation sets, based on provided annotation.
It may be counterintuitive, but for --data_root we need to pass the path to the dataset folder root (in our case it’s data/wgisd) instead of the folder with validation images.
This is because the function automatically detects annotations and images according to the expected folder structure we achieved above.
Let’s check the object detection configuration running the following command:
# or its config path
(otx) ...$ otx train --config  src/otx/recipe/instance_segmentation/maskrcnn_r50.yaml \
                     --data_root data/wgisd \
                     --work_dir otx-workspace \
                     --print_config

...
data_root: data/wgisd
work_dir: otx-workspace
callback_monitor: val/map_50
disable_infer_num_classes: false
engine:
  task: INSTANCE_SEGMENTATION
  device: auto
data:
...
Note
If you want to get configuration as yaml file, please use --print_config parameter and > configs.yaml.
(otx) ...$ otx train --config src/otx/recipe/instance_segmentation/maskrcnn_r50.yaml --data_root data/wgisd --print_config > configs.yaml
# Update configs.yaml & Train configs.yaml
(otx) ...$ otx train --config configs.yaml
To start training we need to call
otx train
Here are the main outputs can expect with CLI:
- {work_dir}/{timestamp}/checkpoints/epoch_*.ckpt - a model checkpoint file.
- {work_dir}/{timestamp}/configs.yaml - The configuration file used in the training can be reused to reproduce the training.
- {work_dir}/.latest - The results of each of the most recently executed subcommands are soft-linked. This allows you to skip checkpoints and config file entry as a workspace.
(otx) ...$ otx train --config src/otx/recipe/instance_segmentation/maskrcnn_r50.yaml --data_root data/wgisd
from otx.backend.native.engine import OTXEngine

data_root = "data/wgisd"
recipe = "src/otx/recipe/instance_segmentation/maskrcnn_r50.yaml"

engine = OTXEngine.from_config(
          config_path=recipe,
          data_root=data_root,
          work_dir="otx-workspace",
        )

# it is also possible to pass a config as a model to the OTXEngine directly
engine = OTXEngine(
          model=recipe,
          data=data_root,
          work_dir="otx-workspace",
        )

# one more possibility to obtain the right engine by the given model/dataset
from otx.engine import create_engine
engine = create_engine(
          model=recipe,
          data=data_root,
        )

engine.train(...)
from otx.backend.native.engine import OTXEngine
from otx.backend.native.models import MaskRCNN

data_root = "data/wgisd"
model = MaskRCNN(
          model_name="mackrcnn_resnet50",
          label_info = {"label_names": ["Chardonnay", "Cabernet Franc", "Cabernet Sauvignon", "Sauvignon Blanc", "Syrah"],
                         "label_id": [0, 1, 2, 3, 4],
                         "label_groups": [["Chardonnay", "Cabernet Franc", "Cabernet Sauvignon", "Sauvignon Blanc", "Syrah"]]},
          data_input_params = {"input_size": [1024, 1024],
                                "mean": [0.0, 0.0, 0.0],
                                "std": [255.0, 255.0, 255.0]}
        )

engine = OTXEngine(
          model=model,
          data_root=data_root,
          work_dir="otx-workspace",
        )

# one more possibility to obtain the right engine by the given model/dataset
# using "create_engine" function
from otx.engine import create_engine
engine = create_engine(
          model=model,
          data=data_root,
        )

engine.train(...)
The training time highly relies on the hardware characteristics, for example on 1 NVIDIA GeForce RTX 3090 the training took about 10 minutes with full dataset.
4. (Optional) Additionally, we can tune training parameters such as batch size, learning rate, patience epochs or warm-up iterations.
Learn more about recipe-specific parameters using otx train params --help.
It can be done by manually updating parameters in the configs.yaml file in your workplace or via the command line.
For example, to decrease the batch size to 4, fix the number of epochs to 100 and disable early stopping, extend the command line above with the following line.
(otx) ...$ otx train ... --data.train_subset.batch_size 4 \
                         --max_epochs 100
from otx.config.data import SubsetConfig
from otx.data.module import OTXDataModule
from otx.backend.native.engine import OTXEngine

datamodule = OTXDataModule(..., train_subset=SubsetConfig(..., batch_size=4))

engine = OTXEngine(..., data=datamodule)

engine.train(max_epochs=100)
5. The training result checkpoints/*.ckpt file is located in {work_dir} folder,
while training logs can be found in the {work_dir}/{timestamp} dir.
Note
We also can visualize the training using Tensorboard as these logs are located in {work_dir}/{timestamp}/tensorboard.
otx-workspace
  ├── 20240403_134256/
  |   ├── csv/
  |   ├── checkpoints/
  |   |   └── epoch_*.pth
  |   ├── tensorboard/
  |   └── configs.yaml
  └── .latest
      └── train/
...
After that, we have the PyTorch instance segmentation model trained with OpenVINO™ Training Extensions, which we can use for evaluation, export, optimization and deployment.
6. It is also possible to resume training from the last checkpoint.
For this, we can use the --resume parameter with the path to the checkpoint file.
(otx) ...$ otx train --config src/otx/recipe/classification/multi_class_cls/mobilenet_v3_large.yaml \
                      --data_root data/flower_photos \
                      --checkpoint otx-workspace/20240403_134256/checkpoints/epoch_014.ckpt \
                      --resume True
Validation#
1. otx test runs evaluation of a trained
model on a specific dataset.
The test function receives test annotation information and model snapshot, trained in the previous step.
otx test will output a mAP_50 for instance segmentation.
2. The command below will run validation on our dataset
and save performance results in otx-workspace:
(otx) ...$ otx test --work_dir otx-workspace
┏━━━━━━━━━━━━━━━━━━━━━━━━━━━┳━━━━━━━━━━━━━━━━━━━━━━━━━━━┓
┃        Test metric        ┃       DataLoader 0        ┃
┡━━━━━━━━━━━━━━━━━━━━━━━━━━━╇━━━━━━━━━━━━━━━━━━━━━━━━━━━┩
│      test/data_time       │   0.0007903117220848799   │
│      test/iter_time       │   0.062202490866184235    │
│         test/map          │    0.33679962158203125    │
│        test/map_50        │    0.5482384562492371     │
│        test/map_75        │    0.37118086218833923    │
└───────────────────────────┴───────────────────────────┘
(otx) ...$ otx test --config  src/otx/recipe/instance_segmentation/maskrcnn_r50.yaml \
                    --data_root data/wgisd \
                    --checkpoint otx-workspace/20240312_051135/checkpoints/epoch_059.ckpt
┏━━━━━━━━━━━━━━━━━━━━━━━━━━━┳━━━━━━━━━━━━━━━━━━━━━━━━━━━┓
┃        Test metric        ┃       DataLoader 0        ┃
┡━━━━━━━━━━━━━━━━━━━━━━━━━━━╇━━━━━━━━━━━━━━━━━━━━━━━━━━━┩
│      test/data_time       │   0.0007903117220848799   │
│      test/iter_time       │   0.062202490866184235    │
│         test/map          │    0.33679962158203125    │
│        test/map_50        │    0.5482384562492371     │
│        test/map_75        │    0.37118086218833923    │
└───────────────────────────┴───────────────────────────┘
engine.test()
3. The output of {work_dir}/{timestamp}/csv/version_0/metrics.csv consists of
a dict with target metric name and its value.
The next tutorial on how to export, optimize, and deploy the model is available at Deploy & Demo.